Thursday, December 5, 2013

Christmas Wreaths


I just returned from making wreaths with the Pleasant Valley Garden Club.  Every wreath is decorated with natural items collected from gardens and parks... seed pods, leaves, cones, etc.  Some items are sprayed gold or silver, but many were left natural.  It was inspiring to walk around the room and see each wreath, all different, but all gorgeous.  Here's the one I decorated.


The picture may not be the best, but I liked the gold magnolia leaves and the blush of white on the cypress.


When I got home I noticed the wreath we always have hanging on the side of the garage.  I made this huge wreath years ago.  It's about 4 feet across and it's just made from the very long branches from the Banks Rose.  I just wrapped the soft green branches around and around.  If I've pruned all the branches and it's not full enough, I just wait a month or so until more branches need pruning.  Eventually it becomes a sturdy wreath. 


In the past I've wrapped fake evergreen garland around it and stick in some fake holly.  I looked at my shrubs that needed pruning and was inspired to stick the shrub cuttings into my bare wreath.  I was already in my grubby clothes and had my garden clippers in my hand.  I got to work pruning.

 I think it turned out quite lovely.  It's mostly Indian Hawthorn with their dark blue berries.  I tucked in the few dry Hydrangea blossoms I missed when I was cutting them back last week.  I added white and yellow tipped Pittosporum, a few with seed pods.  And then to finish it off, I added some red tipped leaves from Nandina with the clumps of bright red berries.  

We'll see if it holds up over the holidays.  If not, at least I got some pruning done.

Sunday, April 28, 2013

It's Cheaper to Move the Plants

The title of today's blog post is a quote from Jose Calderone, a guy who came to fix our sprinkler system.  We had one water spout and one flooded area.  I also thought we needed to adjust the timing, but I didn't know how to go about it.  So I remembered a little flyer dropped in our yard a few months back.  This flyer was more than the usual business card or ad with a name and contact information.  This one had Sprinkler System Tips such as the best lawn watering time (3am-6am) and the  months to adjust watering time (Early March, Early June, and Late September).


So I called the number and Jose came out.  He was prompt, friendly, and really seemed to know what he was talking about.  As it turned out, both the water spout and the flooded area were easy fixes.  He adjusted several sprinkler heads.  (I didn't even know they could be turned down!)

I would recommend Jose if you need a help in your garden.  He does landscape maintenance as well as care for sprinklers.  He said I could share his number, but I didn't tell him I had a garden blog.  I hope Jose doesn't mind me sharing his phone  number here.
Jose Calderone
Evergreen Landscape
805 276-8630

And as we looked at the front area where I've planted the Coral Bells and replanted some ornamental strawberries, I pointed out the edge that doesn't get watered.  You can see the line where I've put in the arrows.
Two of the Coral Bells were on the wrong side of that line.  I said I should move the two plants, and Jose agreed, saying "It's cheaper to move the plants than to more the sprinklers."  Yep.

And when I was at B and B Hardware I saw the 4" Coral Bells displayed in the front of the store.  Two different varieties!  And since they were smaller, they were also about 1/2 the price.  Though I really had enough plants, I couldn't pass these up.


So the big picture shows the new configuration.  I moved the Lemon Chiffon to the back.  Since its yellow color shows up better, it can bring the eye to the back.  I moved the Ruby Veil up to the front, and planted the new plants, Amber Waves and Cinnabar Silver, on either side of it.

By the way, thanks to my friend, Marie,  I think we have the name of that mystery flower in the front.  She thinks it's Blue Salvia.  I've planted other salvias that do not stay neat and tidy like mine and hers look much larger.
What do you think?  Same plant?


Saturday, April 27, 2013

The New Member of our (Gardening Tools) Family

Meet the Green Machine.  He arrived this morning and I am so grateful to Allen for assembling it!  And then, to make things even better, he put it to work today too!

You see, normally my work load in the garden is limited by the yard waste barrel.  I can clip until it's full and then I'm done for the week until the city comes to empty it.  I can make more room in the barrel by clipping each branch into much smaller pieces so they can snuggle down, filling the nooks and crannies.  But that means a lot more clipping.  My poor hand gets so tired!  By the time the barrel is full, I need the rest of the week for my clipping arm to recover. 

Did I mention the garden club is coming in a couple of weeks?  I had lots of clipping to do!  Allen said, "If only you had a chipper."  Good idea!  I went off to Home Depot to get one.  They don't sell them at the store, only online.

As I compared them online, I found that Amazon had a bigger selection and sold them much cheaper.  And since we have Amazon Prime, the shipping is free.  For only $8.99 they delivered overnight!  Within 24 hours, the Green Machine moved in. 

After I ordered the chipper, I got to work on the creeping fig on the back fence.  And the Pittosporum was in the way so I clipped that too.  While I was at it, I cut it a little shorter.  Then I cut another Pittosporum back too.  I ran out of room in my folding barrel, then filled up the middle sized tub.  I tossed the bigger branches into a huge pile and just left it there. 

The Green Machine arrived this morning.  Allen put it together and started chipping those branches.  I felt lazy watching him work, so I went to the front yard and started cutting the branches sticking out from the Indian Hawthorne hedge.  When Allen finished the branches in the back, I took the Green Machine to the front and started in on that pile.  All those chips went into our compost bins.  Instead of tossing those branches, and buying mulch, I will turn the branches into mulch.  Score!

I started in on the leaves with the Leaf Hog.  The Leaf Hog doesn't pick up sticks.  The Green Machine doesn't do piles of leaves.  So Allen started in again on the little branches left behind by the Leaf Hog.  The Leaf Hog cleaned up the remaining debris from the Green Machine.

Dump the last bits.  Roll up the cords.  Park the garden power tools in the garage.  It's time to sit with a glass of wine and enjoy our accomplishments!


Saturday, April 20, 2013

Planting under the Birch

 Every year I replant this area under the birch tree in our front yard.  I have a swirling informal hedge of Indian Hawthorne in the back from this view and in the front I have a border of ornamental strawberries.  There is a tree in the center.  There was a huge Ash tree there when we first moved here.  We took it out and planted a smaller, more polite birch tree that was donated to us by a neighbor.  This year's planting doesn't look colorful yet, but I have high hopes.


This is the way it looked last year.  I planted pansies, johnny jump-ups, and snapdragons.  I also tried a few Ranunculus.  It looked great for a month or so, but then the flowers dropped.  I hoped they would come back this year, but it's been looking pretty empty except for the allysum.  Ogren rated the allysum as a 6, so I really shouldn't let it live here, but it's so pretty and it comes back every year.  I don't have the heart to kill it.  

I usually plant annuals here for their showy flowers, but they need to be replanted each year.  I've tried some perennials before and some have hung in. There is a dahlia my friend gave me.  It has appeared again this year, but it never seems to make it to the flowering stage.  A few snapdragons show up each year, but not enough to make much of a showing.


There are 3-4 of this mystery plant with the square stems and purple flowers.  I just tried to look it up and came up with Calamint.  I don't remember that name, so it may have been called something else when I bought it.  The search validated my thought that the square stems mean it's related to the mint family.  I really would like to find it again at a nursery.  I would happily buy more!


This year I decided to put in more perennials.  That's kind of the theme of my garden.  The perennials, as a rule, are not very showy with lots of big, bright flowers, but there is always something to look at all year.  I do want flowers here to greet my guests. 


This year I'm trying a border of Portulaca, Moss Rose.  I bought them at the suggestion of another shopper at the nursery.  She says you can't kill them.  They are a succulent, so I may kill them with too much water.  If they survive, they may try to take over.  I like their sweet showing flowers that come in many colors including this bright pink, as well as yellow, orange, and white.  It's got a 2 on Ogren's scale, so that works for me.  We'll see how they do.


I won this plant at the garden club meeting.  It's called Nemesia.  It's also a 2 on Ogren's scale and it has light lavender flowers.  Very pretty!  I'll buy more of these if I see them at a nursery.  They are an annual though, so if they don't reseed themselves I'll have to replace them again next year.


I also planted Delphiniums and Aquilegia, Columbine.  I really love both of these flowers.  The Delphiniums should grow nice and tall, about 36."  They're supposed to bloom in early summer and fall.  I bought 3 large ones that are all dark blue, called Magic Fountains.  I also bought 3 eight-packs of "Magic Fountains" that should have a mixture of pinks and light blue flowers.  I bought 3 eight-packs of Columbines called "McKana's Giant."  The tag says they should grow to 30" with flowers in white, yellow, red, and purple.  They should bloom April to May.  It's the middle of April now and there are no flowers yet.   Both Delphiniums and Columbine are poisonous, so I wouldn't put them in the back yard, but our dogs are never out in the front yard unsupervised.  They should be OK here.

If these new perennials do well in the conditions I'll give them, they may fill in this area with blooms through the summer.  I'm getting quite a variety.  Perhaps as I try various plants, a few of each will reappear.  After all, I have titled this blog Confessions of a Lazy Gardener.  Lazy gardeners do not replant every year!


Friday, April 19, 2013

Planting Under the Oak

What to plant?  The ornamental strawberries haven't been doing well under our neighbor's big tree.  I believe it's a California Oak, but I'm really not sure.  I do know that the moths that invaded it last year were identified as California Oak Moths, so that's what I'm going with here. The gardeners planted begonias which didn't do much better. 

So I took my trusty Allergy Free Gardening to the nursery to try something new.  I went to Green Thumb in Ventura,  When I asked for suggestions I was directed to Richard (I think that was his name.) who lives in Ojai and has been successful planting under oak trees there.  He said the trees make the soil acidic and they really shouldn't get too much water.  There is morning sun, but it is usually shady in the afternoon.  Richard made a suggestion or two, but when I looked them up they were fairly high on the Ogren allergy scale.  (From Allergy Free Gardening. See my discussion of this book here.)  Then Richard suggested Heuchera, AKA Coral Bells.  It's a 1 on Ogren's scale meaning low allergens.  It grows in full to partial sun.  The size is right.  Score!


I really like the look of these plants!  There is quite a variety of foliage color and even some variety in leaf shape.  I told Richard that obviously they're grown for their leaf color, but Richard said they're also grown for their flowers.

I especially like the one on the lower left of this photo, Stoplight Foamy Bells with the lemon yellow leaves with the red veining.  The Midnight Rose, in the back in this photo, which is described as "fabulous burnished black leaves are spotted hot pink in the spring, lightening in summer to cream and pink spots."  Of course, these two varieties cost a bit more.  I got as much variety as I could with the cheaper varieties and put these two up front.

I really hope they do well under the tree!  It sounds like they will put on quite a show.  They're supposed to grow about 10" tall, 16" wide. 


Thursday, April 11, 2013

Building a Mountain out of a Molehill, part 2

I think most of the heavy lifting is over for this project.  The parsley, sage, rosemary, and thyme are all in, as well as oregano, mint, basil, and lettuce.  I also sowed some cilantro seeds.

I was so happy when I was planning this herb garden that there is a watering system available!  When my friend Daniel installed the sprinklers I was surprised to see a drip line back there.  It didn't make much sense to me.  But the drip line head is just to the left of the mini-mountain.  That made it very easy to run three lines up there.  Hopefully that will be enough to get everything watered properly.  There are still a few lines available to add later.  Perhaps I should run the cycle when I can watch it and maybe even put something out there to serve as a rain gauge.  Remember, I define myself as a lazy gardener.  I know I'm not likely to stay on top of things if I have to water by hand regularly.

I plan to post another photo when I've filled in more of the crevices with soil, the friendly weeds that are serving as the ground cover fill back in, and the lettuce and herbs are larger.  For now, it's filling its purpose. . . to give me something to look at out the living room windows.

Tuesday, April 9, 2013

Building a Mountain out of a Molehill

Way back on April 21, 2012 I wrote about some of my favorite views and one not-so-favorite one.  This is the not-so-favorite one.  It was a tiny bit better when viewed in real life, since you can focus on the view instead of the door frames.  But still, there a rather large area with not much to see.  I had run out of ideas when I originally re-landscaped the yard, leaving the three citrus trees and a few weedy Salvias.  Then a couple of years ago I took out the lemon tree that I'd grown to hate.  So behind the door frame, there really was nothing to see at all!  And this is the view from our living room. Since then, I've tried to focus on the bird feeder just to the left of this view and when my thoughts drifted to the right, I tried to figure out what I wanted to put in there. 

I've looked at plants that might be interesting enough to be a statement.  I've wondered about adding on to the water feature.   I searched Pinterest, and I started noticing some rather beautiful raised beds.  Then a few weeks ago I did a rather foolish thing.  I volunteered to have the local garden club add my garden to a tour of 5-6 of our members' homes.  Yikes!  Now I feel I need to get in there and really make my garden look its best...  and finally do something about that area that has felt like a gaping hole.

So here's my idea.  I plan to build a raised herb garden that echoes the waterfall.  And of course, I want to do it for next to nothing.  So I froze my gym membership to give me both more time and money and I'm doing my weight lifting at home.

 I started off with retaining wall blocks from Home Depot.  I've found that my car and my back can move six 60 pound blocks in a day.  I want to keep the hill from actually contacting the fence.  Like the waterfall, with tall plants in the back blending in with the ivy on the fence, it really shouldn't look too strange.  I've got I made 4 runs there.  That's 24 blocks...   1,440 pounds, if you care to know!  Plus 8 cubic yards of store-bought soil.


I went out to Peach Hill Soils to get some rocks.  Peach Hill would deliver to my house, but they would dump them onto my driveway and couldn't promise they wouldn't damage it.  The owner thought he might be able to find someone with a truck and time they wanted to fill with a small job, but I guess it sounded like too much work for not enough pay.

So my Camry is now the rock hauling "truck" and I am the manual laborer.  It is a lot of work, but the money is right!  Plus, I did say I would be doing my weight lifting in my garden.
 This picture represents two "Camry/truck" loads of rocks.  It's getting there!  maybe one more load of big rocks and I can start filling in with smaller rocks.  It's not a mountain yet, or even a molehill, but at least it hints at something to look at.


Sunday, March 10, 2013

Finding the Fence

I haven't posted in a while because what I've been working on is not very photogenic.  Not only that, there's no beautiful "After" picture to show here.


It's really pretty hard to tell, but this is our ivy covered fence.  And no, that's not your imagination.  It is not straight and upright!  The ivy has been neglected for a very long time.  I let it go unchecked way back when.  When the gardeners took over, they would shave it every now and then to even up the surface.  It looked nice.  But underneath, those vines were growing thicker and higher and digging their way between the fence boards.  


 I tried to take a picture of what the ivy is doing as it grows above the fence.  The ivy that I think of with its delicate green vines grow thick like a tree trunk.  In fact, we thought it was a tree on our neighbor's side.  It turns out they thought it was a tree on our side!  The "vines" are about 4-5 inches in diameter in some places!  

As I cut away the old dead vines on our side, I found old dead leaves that had collected inside, turning to compost.  Judging from the odor and scraps of plastic I found, I believe it was literally a rats' nest.  Let me tell you, between the ivy growing between the fence boards, the compost and moisture rotting the wood, and the termites' damage, there's not much holding up the fence other than the remaining ivy.  


So I clipped and sawed and pulled and raked.  I filled our yard waste barrel and our large trash barrel that serves as an overflow yard waste bin.  I kept working and made a huge pile out of sight behind the waterfall.  I came in filthy each day, with scrapes on my arms, sticks in my hair, and praying I haven't been exposed to Hanta Virus or something equally nasty.

It looks pretty ugly right now.  I still hope to get a few more old vines off the fence.  Soon there will be fresh green (and soft!) vines covering the fence and it will look a little better.

The fence really should have been replaced long ago.  When we were renters, over 15 years ago, the fence was threatening to fall down.  The landlord had metal posts put in to keep it up a bit longer.  The thought of dealing with the ivy was overwhelming then.  I will have to find a way to broach the subject of a new fence with our neighbors soon.  When we do replace it, at least cutting back the ivy (on our side) will be manageable. I vow right now, to keep the ivy in check from now on!

I have to admit, as gross as it was to do, and as ugly as it looks right now, I feel better having done it. 

Monday, January 21, 2013

Harvest in January

Oranges and limes.  Oh my!  I remember our time in Alaska, spring and anything colorful outside was still about 4 months away.  I love living in Camarillo!

Tuesday, January 8, 2013

Springtime


The Christmas wreath from the Camarillo Garden Club is still hanging by the front door, but the Hyacinths say it's spring.

Thursday, January 3, 2013

Happy New Year!

It's time for new beginnings.  In my yard, it's time to prune back the rose bushes. 

When we had gardeners, I was home on Christmas break when I saw them getting ready to cut back the roses.  I begged them to wait until after Christmas.   How lucky we are here in southern California to have roses.  I mean, we even have a parade all about flowers, especially roses, on New Year's Day.  The Rose Parade is viewed from all over and people marvel at the floats covered in plant material and billions of blossoms.  After our 8 years in Anchorage, Alaska, I understand how precious that is.

So I have roses for Christmas.

But after Christmas, it is time to cut them back.  The plants really benefit from a winter break. 

Rose bushes are actually composed of 2 plants; root stalk and the specially grown flowering plant.  The root stalk is from a hardy plant.  The tops are grown for their various special attributes.  Some roses are grown more for their coloring, others for their shape, and still others for their scent.  I recently learned that the flowers grown for florists are grown to be long lasting, but rarely have much of a scent.

But those root stalks are, by definition, hardy.  They will do their best to grow.  They send out branches usually called "suckers."  These suckers may grow flowers, but they won't be the glorious blossoms you bought the plant for. 
 
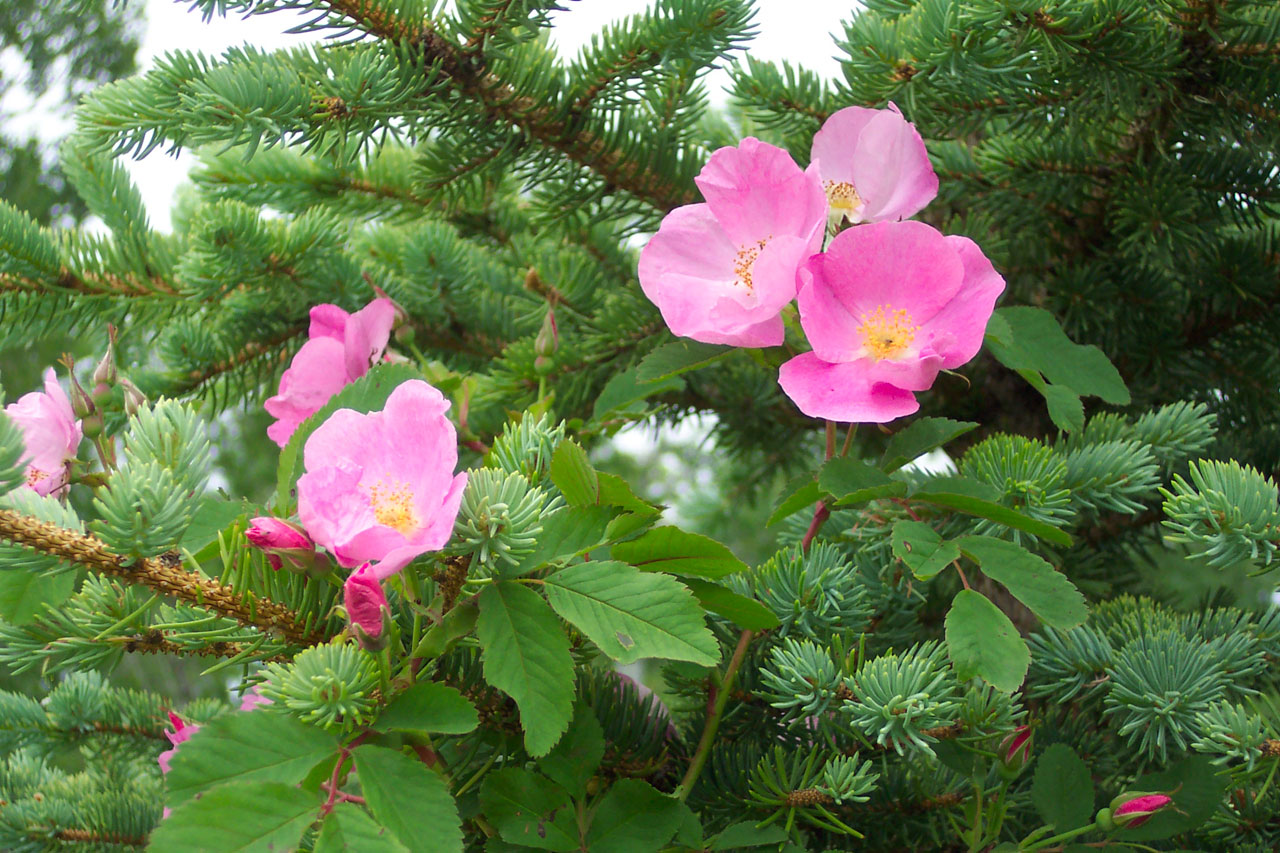
When we lived in Alaska I saw wild roses for the first time.  They only have about 5 petals and you might not even recognize them as a rose.  After they bloom, a rose hip is left.   Roses and rose hips are edible.  In fact, rose hips are sold as a vitamin C supplement.

But I digress.  Back to the top part of the plant.  Rose hips are the seed portion of the plant, but the roses we buy are not grown from seed.   They are more like cloned.  If one plant grows different looking flowers that the grower likes, branches are cut off and stuck to a cut branch on the root stalk to make a new plant.   The cut portions are held together until the desired branch can get its nourishment and grow from the root stalk.  This is called grafting.  That new type of flower is patented and it works like a copyright.  It's illegal for you to copy this process to make more roses from someone's plant. 

You can see the tag still attached to this bush.  It gives the name of this variety, Memorial Day and then in (WEXBLUNEZ)  I'm not sure what that is.  It may be the grower.  But after that, the print might be small, but the meaning is quite clear.  Asexual reproduction of this patented plant without license is prohibited.  In other words, do not make a copy of this plant by doing your own graft. 


If you really want those fancy flowers you spent good money for, you will cut off those suckers!  You can see a lot of suckers coming off the base of this plant.  I took my pruning saw to these branches to cut them as close to the base as I could.


You can probably see the brown older branches on this bush as well as the green branches.  The older branches are that part of the plant that was grafted onto the base.  The green branches are last year's growth.  So I cut back the green.  You could leave a little of the green on.  It will be easier if you cut back the top branches to get them out of the way.  Then you can see what you're doing easier and there will be fewer thorns reaching out to snag you.


This bush is done. 


This rose bed is done.   With the rose bushes cut back, it was easy to clean up the dead branches from the Mexican Evening Primrose.  

This is our bedroom window.  I cut that center Nandina so it doesn't block my view quite as much.

The bed looks kind of bare now.  I would have paid good money for anything green and growing in Anchorage at this time of year!   I am very happy to have a garden with something green and even colorful all year round.  The tall Nandina with its red berries and the shorter Nana Nandina with its red tinged leaves are filling the bill for this area of my garden right now.


Our bird feeder had been chewed so that the seeds just poured out of one of the holes. when I filled it.  So this is my new bird feeder.  Hopefully the birds won't be too unhappy with all of the changes!  I appreciate their yellow and red feathers and their happy songs.  Maybe they'll be back outside my window tomorrow morning.

Spring comes early here, so it won't be long before the roses are growing with refreshed vigor.