Mexican Evening Primrose, Oenothera berlandieri. My brother-in-law gave us some of these. We drove them down from the bay area and they have done great. They really can be a weed, taking over, but I cut them back freely and they have behaved themselves. I love their pale pink flowers! They fill in around under the rose bushes.
They do die back during the winter, but their appearance is always a pleasure!
The UPS man delivered yesterday. Charlotte was very patient with him when he came through, destroying her home. I didn't hear either of them yelling. She may have cursed silently, and perhaps the UPS man did as well.
Charlotte stayed up all night rebuilding. This time she rebuilt just a bit lower, but did not include a line to the pilasters. I climbed up on a chair to take this photo. I was perched precariously, trying to focus on the spider, but the camera kept focusing on the tree way behind the web. As I leaned closer, trying to find her in the shot, I realized the breeze was blowing her and her web toward me! Time to rethink this shot! So I climbed on our big rock so the sky was behind the web. The camera could focus on Charlotte, and her web was no longer aiming right at me.
I would really like to see how she manages to run a line from one tree to the other. Does she climb down, crossing the sidewalk, laying line behind her and somehow managing not to get it tangled along the way? Does she take a flying leap when the breeze is just right? Does she shoot the web with her tiny fly-fishing pole? Does she enlist the help of some trusting flying being? I thought I'd see if I could find out, so I headed over to YouTube. I found this delightful video. I didn't learn how the initial line is strung from tree to tree, but I did learn a lot!
Spiders are fine, but I've got to admit this guy is more accepting than I am!
Here's another video. You can almost see how this spider makes her stitches!
Charlotte still has lines going to the two trees, so if you come visit me you will be walking under
her handiwork. Today you can walk up our sidewalk without disturbing
her web. But if I were in your shoes, I'd watch my step... looking up!
Update: My sister sent me this helpful site. Apparently they do like to fly fish, but without the fishing rod. I guess that makes sense since it is indeed flies she's fishing for.
At this time of the year I walk through my yard carefully. Usually I'm looking down (we have dogs) and around to check what garden chores I should put on my To Do list. But in the fall I need to look up. It's time for giant spiders and their giant webs. Allen spotted this one from the front door this morning.
The "tie downs" for this web are from tree to tree, about 15 feet apart. I took the photo from back about 6 feet and the spider is about 8 feet up. I did use the telephoto feature on my camera. It's not the largest spider I have ever seen, but I sure wouldn't want to walk into this web!
I remember one year there was a HUGE spider that had made a web looming over the gate to the trash cans. I'm really not very afraid of spiders, but this one had me fearful of taking out the garbage! If I remember correctly, she was about an inch or more... maybe six inches!
I believe these are Garden Spiders and they really aren't aggressive. They are actually considered a beneficial insect in the garden. They eat insects and anything that goes after the flying pests is a friend of mine! If you take down the web, they are likely to just rebuild it in the same place and it is pretty amazing how quickly they can construct these enormous structures. When they have built a web lower down, I actually like to look at the beautiful patterns on their bodies.
So I let them be. But I walk in the garden with my eyes open, and sometimes I carry my garden tools at arm's length in front of my face. I really don't want to disturb any of these friends and then have them looking for a place to hide on me!
The Ginger plant Hedychium, grows next to the waterfall. The flowers smell heavenly! The plant never really looks fabulous though. They tend to lean over like they're trying to get out of the shade of the neighbor's Ficus tree.
I was reading up on it in the Sunset book. It says the foliage of White Ginger is usually unattractive because if it's hot enough for the flowers to bloom well, the leaves burn. Well, it's been hot and the flowers are blooming. You can see some of the edges of the leaves are burned.
I don't know if I have the White Ginger, Hedychium coronarium, or the Cream Ginger, Hedychium flavum. The root was given to me by a friend. The flowers do look kind of creamy to me, so maybe I have the flavum. It's supposed to be more fragrant that then White Ginger and the Kahili Ginger.
The plant looks OK to me and the scent is wonderful!
Isn't this gorgeous? I understand the common name is Frangipani, but I have always known it as the botanical name, Plumeria. The flowers can be white, yellow, pink, or dark rose.
These tropical plants look like a thick stick when you plant it. It is definitely a tropical plant, but it really does well in our area. They don't need much water. In fact, over-watering can make the root system rot fairly easily. I should use fertilizer more often. I keep my Plumeria in pots in an area that is watered with the sprinkler system.
In the winter, the leaves fall off and it looks like the stick I started with. In the spring, the stick will grow a new branch so a mature plant will look like a tree with many branches.
They can be put in the ground, but they cannot tolerate temperatures below freezing. My friend Kristen has a lot of mature plants grown in the ground. She goes out each winter and puts a styrofoam cup stuffed with cotton on each and every branch tip. I think she also wraps the plants. I used to keep a plant in the ground and I would toss a sheet over the plant. It must not have been enough because the plant died. I'm not as dedicated to caring for any plant, not even these beauties. Kristen gives her plants tender loving care and they are so big she has to cut them back in the spring. She gave me some of the "sticks" and now I have my plants in pots.
If you have such a generous and kind friend, the stick needs to be given a chance to dry out a little and heal over at the base. These new cuttings are most likely to rot
In the winter I tote the pots into the garage. They do not need any care whatsoever during their stay in the garage. Do not water! When the leaves start growing again in the spring, haul the pots back out and start watering lightly.
I have been walking past the overgrown Agapanthus for quite a while. The plant has grown away from the original center plant leaving huge thick roots around a bare middle.
These roots looked like concrete. I have been putting it off. I didn't think I wanted to rent a jack hammer or swing a sledge. Ugh!
So I've been thinking maybe I could start at one side and over time, work my way through this eyesore.
So I grabbed my work gloves, my heavy duty work sandals, and the shovel.
It turned out most those concrete "logs" were actually just a thin covering over rotted centers. I was able to pull out a lot of these with my hands.
Sure, some of the root stalks were still viable, but all of the plants in this area had the long overgrown look. Out they go!
I was able to pull all of the Agapanthus in just a few hours. Whoopie!
I replaced the old plants with some that had planted themselves in the wrong place... in other words, they had become weeds.
I covered the area with home-grown mulch. Much better!
I won't wait so long to thin the Agapanthus. It was work, but not nearly as bad as I thought.
The Hydrangeas have been begging me to cut them back! I really don't mind the look of the spent flowers. They keep a pale version of their color. I've even cut them and kept them in vases inside like that. But the plants will really do better if I cut them back.
You can just barely see the dried flower at the top of this picture. Below that you can see the back of a large leaf covering the stem. Then below that you might be able to see some n3ew buds right at the base of the two leaves.
I think you can see the new buds better in this photo. If I cut just above these buds, they should both branch out. As I wrote in my last post, this will make the whole plant healthier and more full. The plant won't spend any more energy trying to maintain the old dying portion and can spend its energy on the new growth.
So I cut it back right above the leaf nodes. Any lower and I might damage the new buds. Any higher and I'd leave a branch to rot. This should be just right to dry up and heal over.
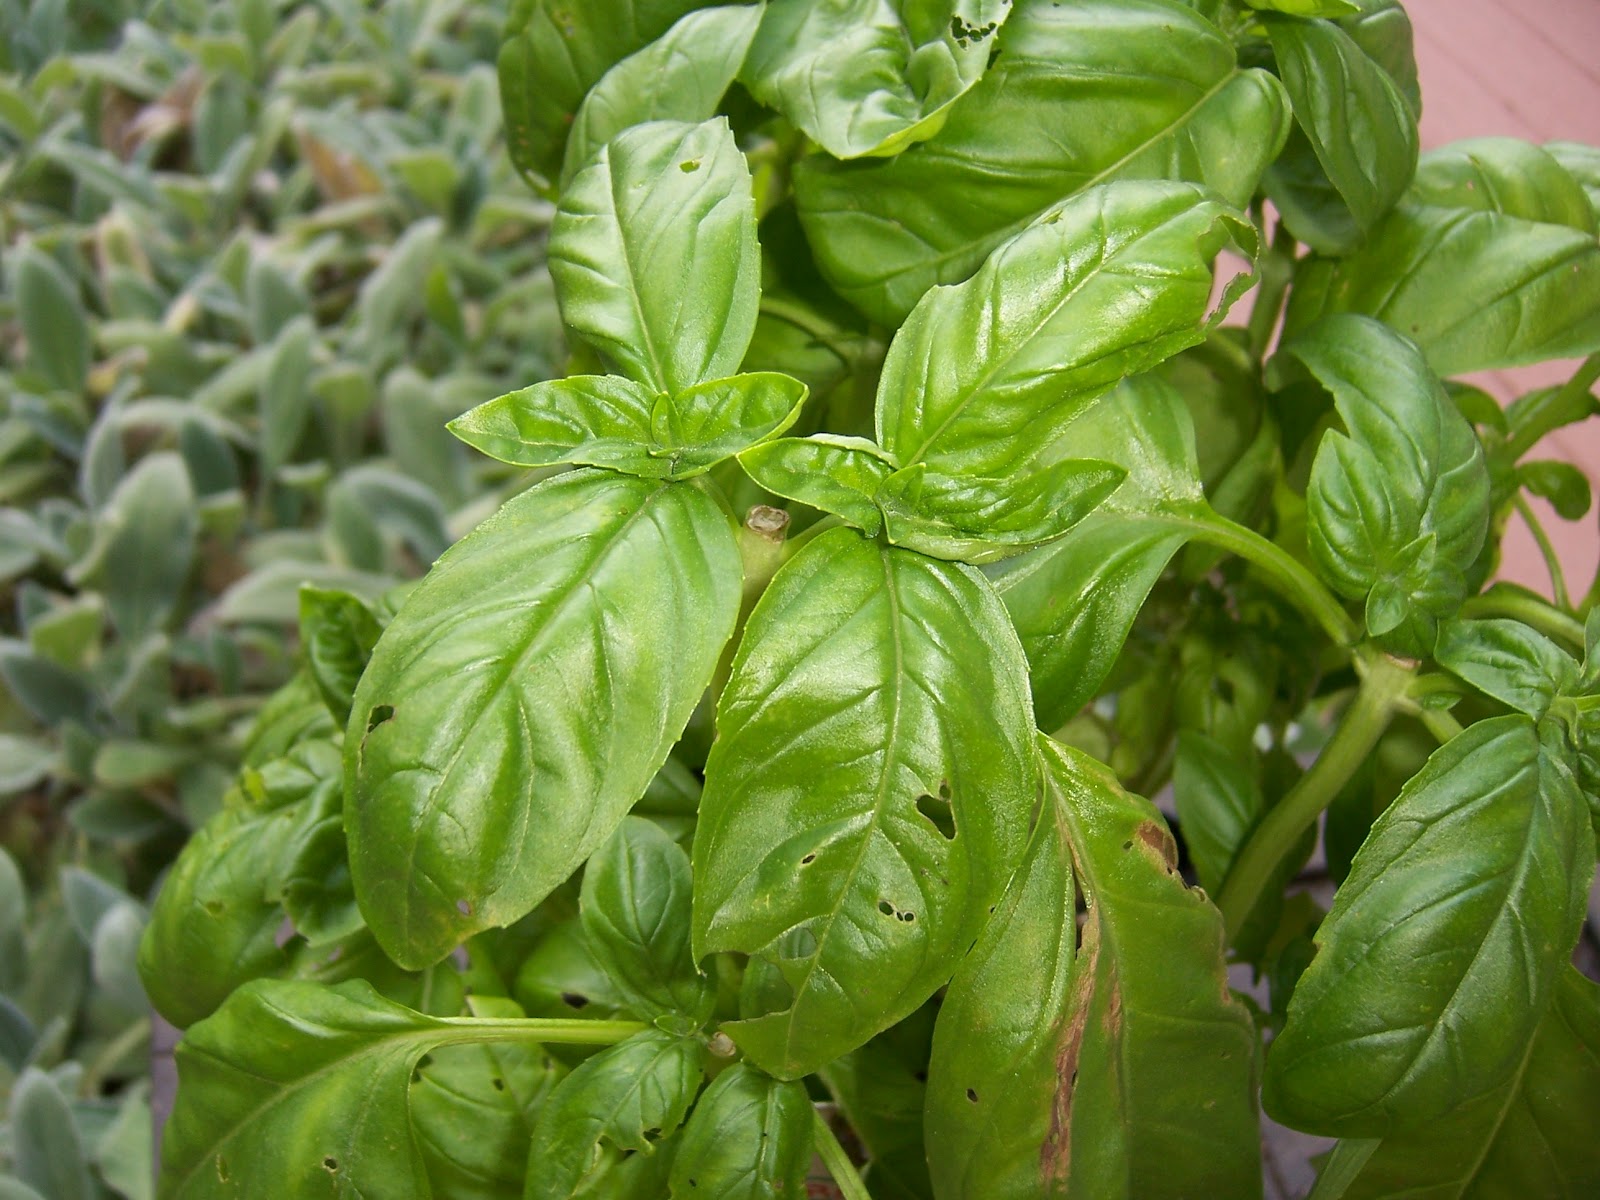
I remember when my dad would cut back our huge Chinese Elm tree in our front yard. It would look so bare and dead. But of course, it always grew back again, healthier than ever. It's actually good for most plants to be cut back. I recently bought a little Basil plant from the grocery store. I have not gotten around to planting it in the ground yet, and I may decide not to. It's doing fine where it is and I really see it as a temporary visitor to my garden.
But like most herbs, it needs to be cut back. This is really a win/win situation! As I cut a few bunches of basil, it encourages the plant to grow back stronger.
In the middle of this photo, you may be able to see a place where there are two sets of new growth with small leaves. Look closely between them and you may see a whitish place where I have pinched off the branch. I made a great salad with garbanzo beans and fresh tomatoes and I also added some fresh basil. That was a couple of weeks ago. It's fairly typical for two branches to start where ever one is snipped, so the plant grows back fuller.
You can just pinch back the ends of the new growth, like those 2 sets of tiny leaves above. Or you can clip lower on the branch. But whenever you cut back, try to cut just above where there leaves growing. You don't want to cut very far between branches or leaves. A short section of branch will just heal over. More than that leaves the plant vulnerable to disease and insect damage. Not only that, it won't look nice having all those sticks poking out.
I think I'll go out right now and pinch back that basil some more. Shall I make pasta with chicken and marinara with fresh basil for dinner tonight?


